Manual location of security certificate: הבדלים בין גרסאות בדף
| שורה 1: | שורה 1: | ||
| − | + | {{עמוד בעברית|מיקום ידני של תעודת אבטחה}} | |
| − | |||
| − | |||
| − | |||
<div lang="en" dir="ltr"> | <div lang="en" dir="ltr"> | ||
| − | |||
{{קישור אנגלית לתצוגת קריאה}} | {{קישור אנגלית לתצוגת קריאה}} | ||
| − | + | {{Navigation|Security certificate|Installing certificate on computer manualy}} | |
| − | |||
If you tried to manually install the security certificate, without success. | If you tried to manually install the security certificate, without success. | ||
גרסה אחרונה מ־14:04, 8 בינואר 2019
לעברית לחצו כאן
To switch from edit view to read view
Home page > Security certificate > Installing certificate on computer manualy > Manual location of security certificate
If you tried to manually install the security certificate, without success.
You should try to place the certificate manually in the correct location.
After downloading the Security certificate
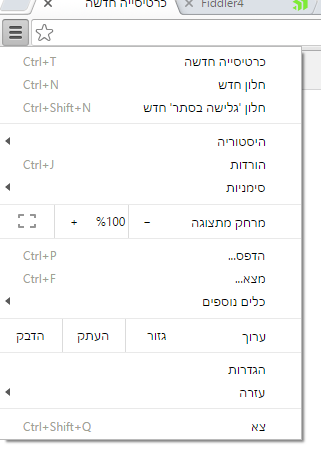
Enter your browser settings
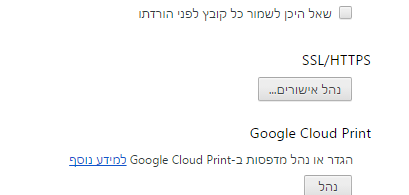
Go to the end of the page, view advanced settings,, and under SSL/HTTPS click 'Manage certificates'
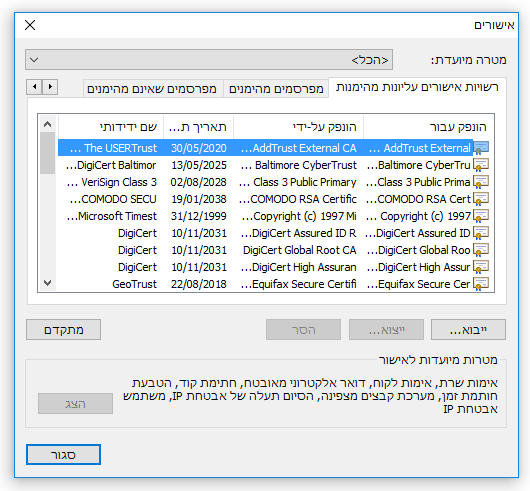
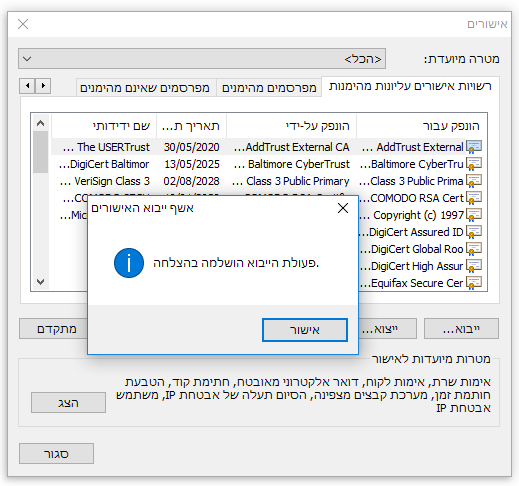
In the next window, go to tab Trusted Root Certification Authorities ' and select Import
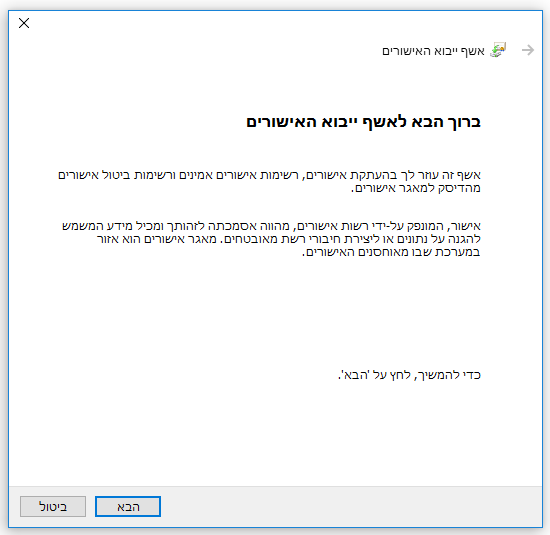
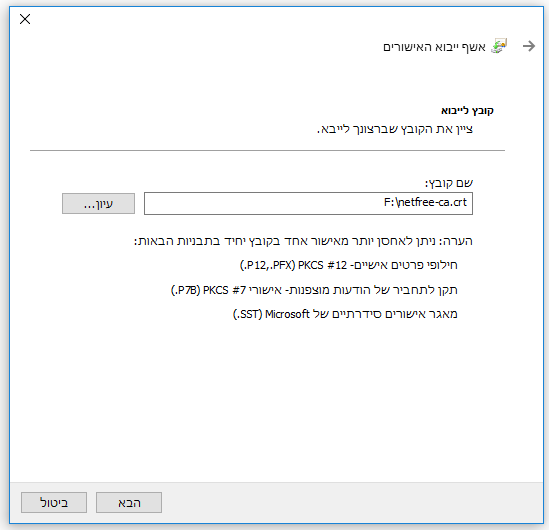
In the next window click on Next
Choose the location of the downloaded file, and click Next again
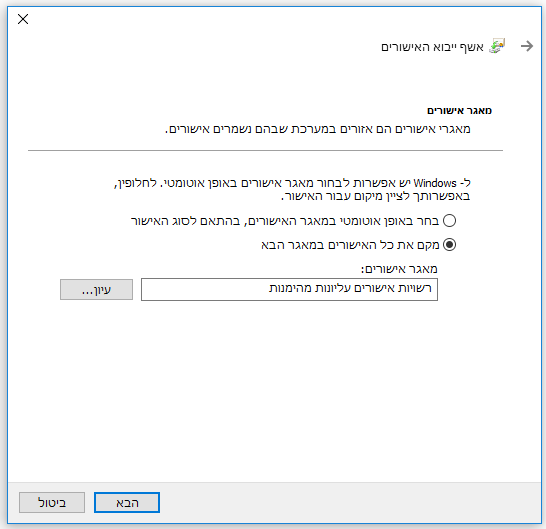
Leave the certificate on the location of Trusted Root Certification Authorities and click Next
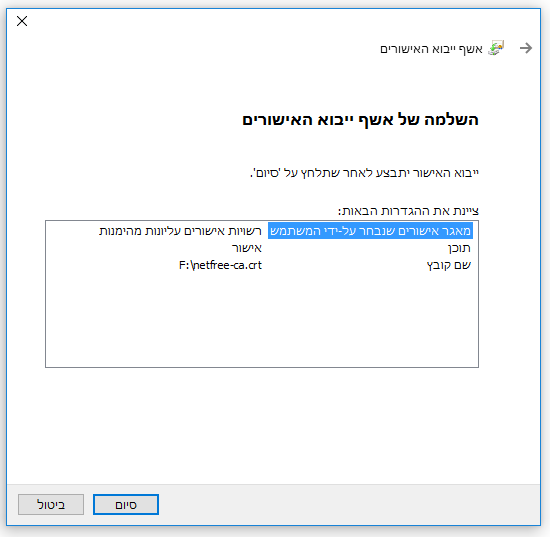
Finish
Close the 2 windows
Close the browser and open it again.
